


Paper OPtions
& detailed hanging instructions for different wall surfaces
This non-reflective semi-matt finish produces exceptional deep vivid prints with fine definition. It’s ideal for creating high-impact, sophisticated wallpaper murals with sharp images that will make an impressive statement on any wall. It is the perfect choice for all medium traffic areas
Features:
- 300gsm – Semi-Matt Smooth Finish
- Fire Rated – (B – s2, d0)
- Strippable
- Paste the Wall
- Butt Join
This lightly textured wallpaper resembles a light stone finish. Good white point for strong, quality image reproduction. The textured surface offers a durable finish which will resist scuffing. The fine-grain finish that is as subtle as it is alluring.
Its consistent surface allows perfect visual impact for Wallpaper Murals.
Features:
- 300gsm – Light Stone Texture
- Fire Rated – (B – s2, d0)
- Strippable
- Paste the Wall
- Butt Join

GENERAL PREPARATION
GENERAL PREPARATION
1. Brush off all dirt and loose material with a stiff bristle brush.
2. All surface contaminations such as dirt, grease, polish, water soluble stains, felt tip pen marks, etc., should be removed by washing with a detergent solution, rinsed off with clean water and allowed to dry.
3. Mould and Algae to be treated with a fungicidal wash and use in accordance with the pack instructions and allow to dry.
4. Any holes, cracks or defects to be filled flush with a good quality filler, used in strict accordance with the manufacturer’s instructions.
5. All substrates should be dry in depth.
Coated Absorbent Surfaces.
• PLEASE NOTE: Multi-coats of paint may impair the porosity of the wall surface and if an oil-based paint forms part of the system, adhesion can be affected. If in doubt contact wallmurals.co.uk for further advice.
• Ensure all surfaces are dry in depth. Apply a coat of Murabond Primer diluted 1 part to 1 part clean water. Allow to dry.
Then hang the wallcovering using the following method: –
Wallpaper : Wet Back of Material
Adhesive : Light Adhesive.
Applied to : The wall surface.
Direction of Hang : Hang in direction of the design.
Type of Joint : Overlap and Trim To Match The Design.
All Adhesives should be applied one drop at a time to keep within the open time of the adhesive.
Coated Absorbent Surfaces

For Non-Absorbent Surfaces
For Non-Absorbent Surfaces.
• PLEASE NOTE: If the surface is cement or concrete or is unstable in anyway, seek further advice.
• Any filled, patched or absorbent areas should be equalised in colour and absorbency with a similar pigmented oil-based paint.
Then hang the wallcovering using the following method: –
Wallpaper : Wet Back of Material
Adhesive : Sealed Surface Adhesive.
Applied to : Paste the wall surface.
Direction of Hang : Hang in direction of the design.
Type of Joint : Overlap and Trim To Match The Design.
All Adhesives should be applied one drop at a time to keep within the open time of the adhesive.
BEFORE YOU START
Make sure that your Wall Mural is intact and has not been damaged intransit.
For best results use the Murabond adheasive products and follow the instructions supplied.
Make sure that you have adequate lighting – so that you can inspect the material properly while you are hanging it and after it is in position. Digimura is re-positionable and can be re-positioned for as long as the adhesive remains wet.
Make sure that the area where you are hanging Digimura is at least 12°C (55°F) … and that there is good ventilation. Do not mix material from different batches on the same wall. If you foresee a problem whilst preparing – STOP – and contact
WallMurals immediately, as no returns can be accepted once installation has started.
Hanging
Our Wall Murals are contract grade wallpaper and are supplied ready to hang with a butt joint for the best possible, professional finish.
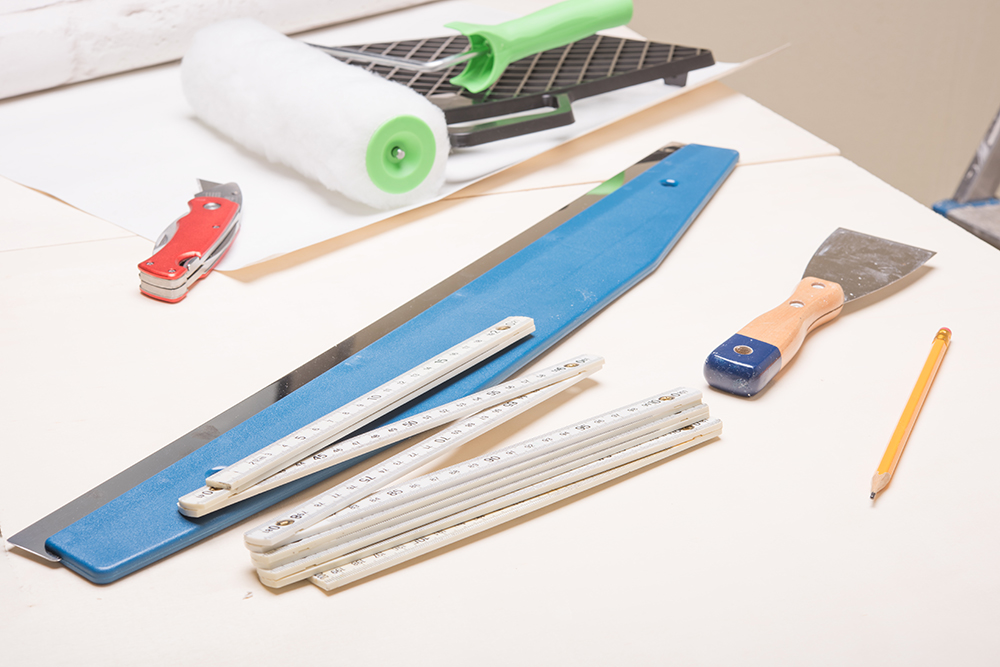
Apply undiluted adhesive to the wall surface to be covered using a medium-pile paint roller and brush. Only paste one drop area at a time.
Use a spatula or wallpaper brush to apply Digimura, using a smooth up-and-down motion. Take care not to squeeze the adhesive out at the edges.
Let Digimura settle for about 15 minutes before trimming the top and bottom.
Never assume bubbling will dry out. Any areas of bubbling must be rectified while the adhesive is still wet Never allow adhesive to contaminate the face of the material, as complete removal may be impossible.
